By Patricia Mikkelson and Claude
When the garden is full of greens, there’s always more than we can eat fresh. Here are simple ways to keep them, with no canning and no heat, plus the greens that keep growing right through an Ozark winter.
Quick refrigerator pickles
This is the easiest way. It uses organic vinegar and garlic, and nothing gets cooked.
- Wash the greens and chop them into bite-size pieces. Sturdy greens work best: dock, wintercress, kale, collards, mustard greens and chard stems.
- Pack them into a clean glass jar with two or three peeled, sliced garlic cloves.
- Mix 1 cup organic vinegar (apple cider vinegar is good) with 1 cup water and 1 teaspoon salt. Stir until the salt dissolves.
- Pour it over the greens until they’re covered.
- Put the lid on and keep the jar in the refrigerator.
- They’re ready to eat after a day or two and keep for about a month in the fridge.
These are refrigerator pickles, not canned pickles. They must stay cold.
Fermented greens
Fermenting takes a little longer but keeps longer, and it makes the greens tangy on their own, without vinegar.
- Chop the greens and pack them tightly into a clean jar with sliced garlic.
- Mix 1 tablespoon sea salt into 2 cups water.
- Pour the salt water over the greens, and push them down so they’re completely under the water. A small zip bag filled with salt water makes a good weight on top.
- Cover the jar loosely and leave it on the counter, out of the sun, for 3 to 7 days. Taste it each day.
- When it tastes tangy enough, put on the lid and move it to the refrigerator.
Anything sticking up above the water can spoil, so keep the greens under the brine. If you see fuzzy mold or it smells bad, throw it out.
Freezing
For greens you’ll cook later, freezing works well. Many people blanch greens first, but for no-heat freezing, simply wash, chop, pack them into bags with the air pressed out and freeze them. Use them in soups and stews.
Greens that last through the winter here
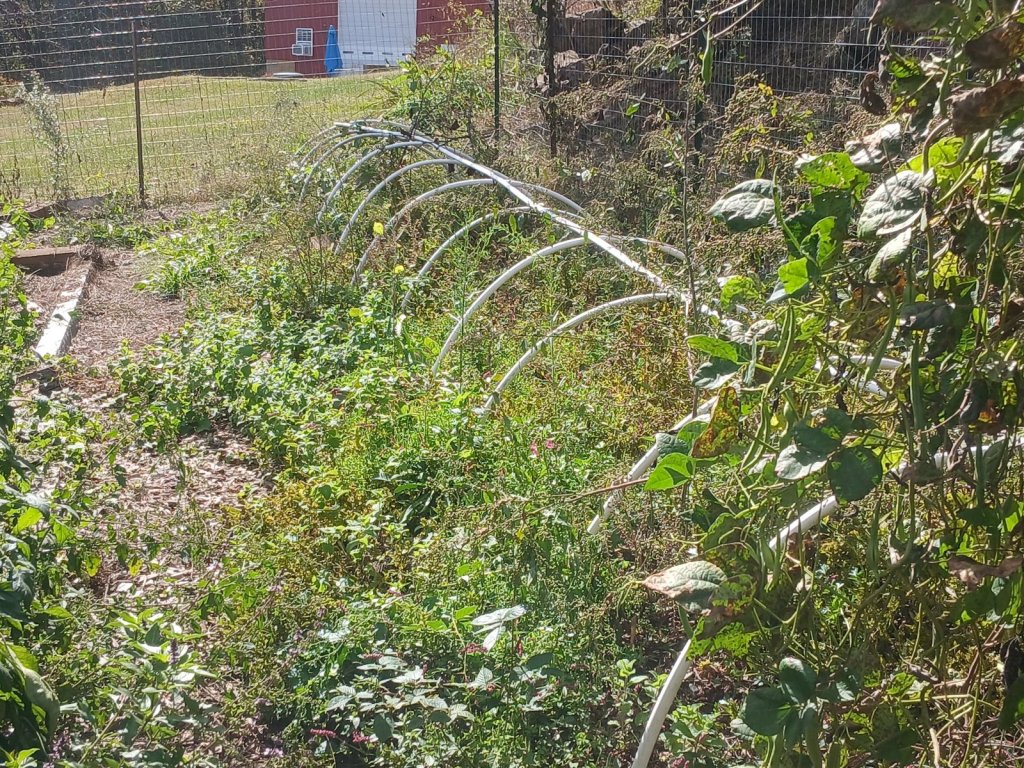
Some greens keep growing in the cold or come back in the first warm days: You can also grow them under a low tunnel which has worked well in the past in the fenced in garden. Covering these wild plants with leaves or some other mulch also protects them.
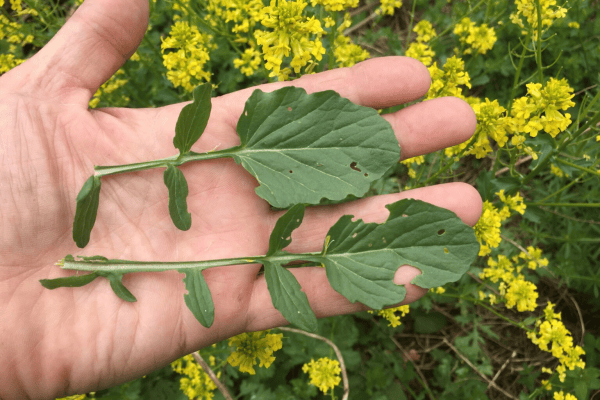
- Wintercress. It stays green under the snow and is one of the first greens of spring.
- Dock. Its new leaves come up very early in spring.
- Kale and collards. They get sweeter after a frost.
- Chickweed and henbit. Tender wild greens that come up in cool weather.
- Dandelion. The young leaves appear in late winter and early spring.
- Spinach and mustard greens. Planted in fall, they can carry through with a little cover.
- Chickweed comes early in the spring and can last through the winter in protected areas.
Something to know about dock and wintercress
Both are best eaten in moderation. Dock is sour from oxalic acid, and wintercress is bitter. Mix them with milder greens, and cook the older leaves. I do well eating these chopped up and massaged with a little salt and onion–but not all people can eat as much wild stuff as I do.
How we wrote this together
This article was written by Patricia Mikkelson with Claude, an AI assistant made by Anthropic. Patricia shared her greens and her plans, and Claude wrote up the methods.


[…] Keeping Garden Greens Through the Winter […]
LikeLike
[…] Keeping Garden Greens Through the Winter […]
LikeLike