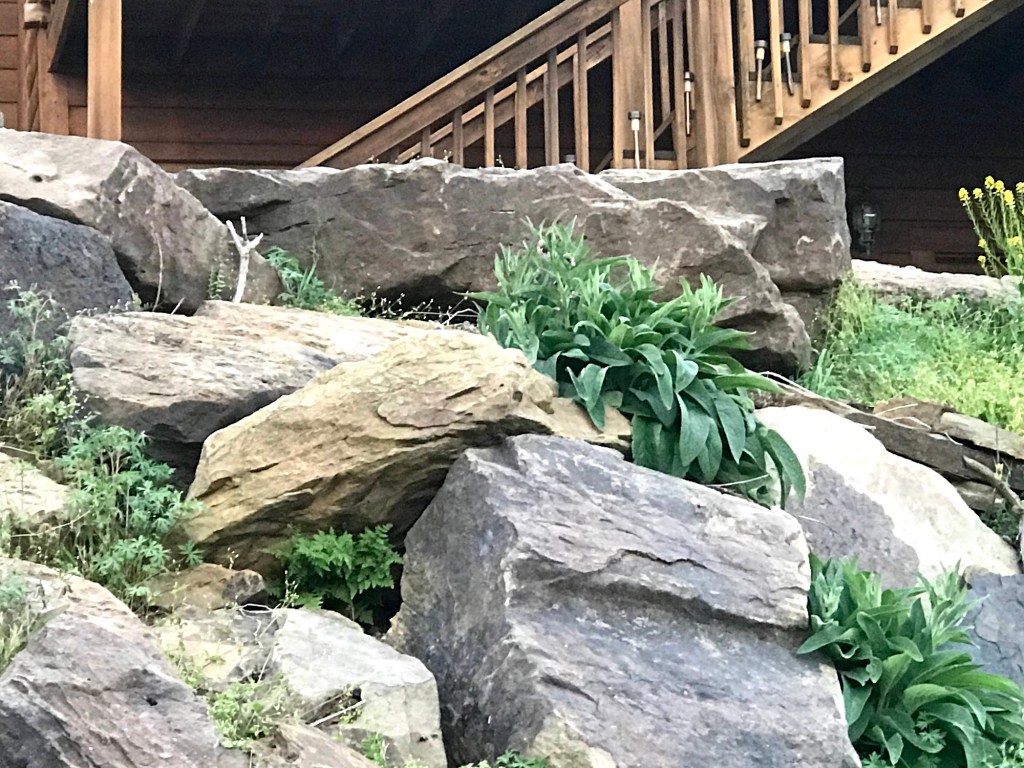
In short: Below the log house, a huge retaining wall of boulders, some four feet across and three feet high or bigger, holds the hillside in place. Between them are cracks and holes so deep they seem bottomless. Here’s how to turn that kind of rock pile into a living rock garden: how to fill deep voids so the soil doesn’t just disappear, how to keep it from leaking out the ends of cracks, and which plants will thrive there.
A Rock Pile With Possibilities
When the log house was purchased by the new owner in 2006, built, huge boulders were stacked down the slope below it as a retaining wall, keeping the level ground the house sits on from sliding down the hill. When I first moved in, almost nothing grew there. It was a tumble of bare stone.
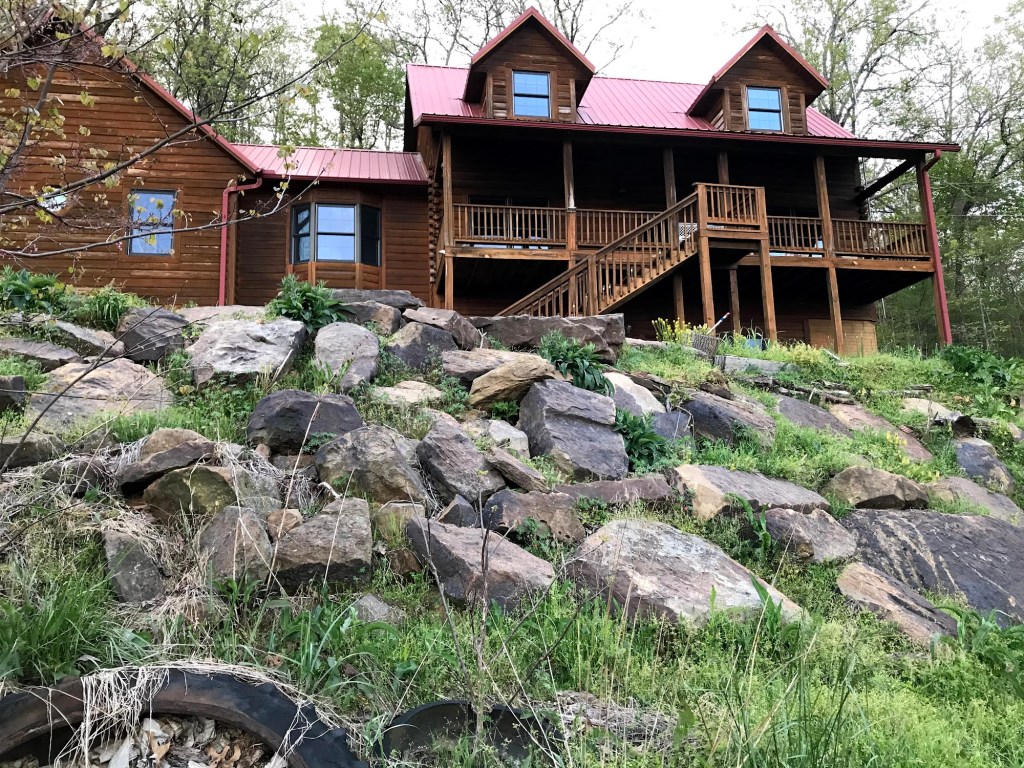
Through permaculture eyes, though, a boulder wall is full of gifts. The rocks soak up the sun by day and give back warmth at night, so the pockets between them make a little microclimate. Rain runs off the stone into the cracks, where it stays moist and shaded. And it’s almost all “edge,” sun beside shade and stone beside soil, the kind of place where life loves to gather. Roots growing between the boulders also help hold soil on the slope.
Safety First
- Leave the boulders alone. Never pry, shift, or dig under them, and don’t remove anything from the base of the wall. If a boulder ever looks loose or starts to move, stop and call a qualified professional.
- Let water drain. A retaining wall needs to let water pass through. Fill voids with loose, free-draining materials like gravel, sticks, and wood chips rather than packing them solid with heavy wet soil, and if you ever see water seeping out in a new place or stones shifting, get professional advice.
- Respect the snakes. Most Ozark snakes are harmless rodent-eaters, but copperheads love rocky places. Wear boots, long pants, and thick gloves. Never put your hand into a hole you can’t see the bottom of. Probe with a stick first, move slowly, and give any snake room to slip away. The Arkansas Game and Fish snake guide helps you tell who’s who.
The Real Challenge: Holes With No Bottom
With boulders this big, the gaps between them can be enormous. Some holes seem endless, with empty space running underneath the rocks. Pour soil into one, and it simply vanishes into the next hole down. You can’t fill a void like that with soil alone. You have to build it up from the bottom in layers, almost like a buried hugelkultur bed. Since we can’t see what’s down there, the trick is to be creative and use whatever organic matter the land provides.
The Layered Plug Method
- Probe the depth. Push a long stick or a piece of rebar into the hole to feel how deep it goes and where it turns. This tells you how much filling it will take, and it’s a safe way to check for snakes.
- Build a false floor. You don’t have to fill all the way to the bottom. Jam sturdy branches or short logs crosswise into the hole, resting their ends on ledges of rock, so they wedge in and make a floor at a depth you can work with. Wedge them snugly, but never pry against the boulders. Slow-rotting wood like cedar is actually useful here, because you want this floor to last for years.
- Add rubble or gravel if the gaps are big. Fist-sized rocks dropped onto the floor, then smaller gravel, fill large spaces cheaply, never rot or settle, and let water drain through.
- Lay a sieve. This is the key step. Before any soil goes in, line the hole with something that lets water through but stops soil from sifting down: old cotton rags, worn-out cotton or wool clothing, burlap sacks, cardboard, coconut coir, or thick mats of leaves or straw. Use only natural fibers, since synthetic fabrics break down into plastic bits in the soil.
- Add a woody sponge. Pile in smaller sticks, rotting wood, and wood chips. Like the buried logs in a hugelkultur bed, this layer soaks up rain and slowly turns into rich soil.
- Add the greens. Fill with fallen leaves, grass clippings, garden trimmings, and chopped comfrey leaves. These break down fast and feed the soil life.
- Top it off and plant. Finish with several inches of good soil mixed with compost, plant into it, and cover with mulch.
Expect the fill to sink as the wood and leaves break down. That’s normal. Just top it up each year with more leaves and compost.
Keeping Soil From Escaping Out the Ends of Cracks
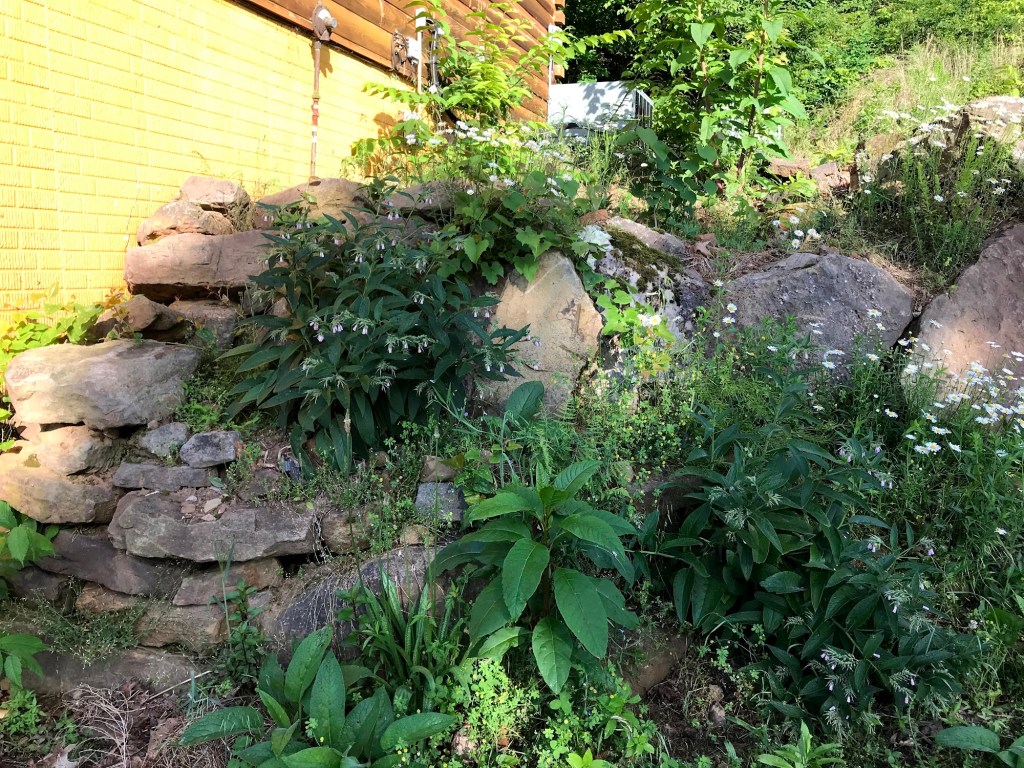
Long cracks between boulders often run downhill, so soil washes right out the open end with the first hard rain. Plug the ends before you fill:
- Stone dams. Wedge flat stones or a few smaller rocks across the low end to make a little dam.
- Rag and burlap stoppers. Roll up cotton rags or burlap and stuff them tightly into the end of the crack, like a cork.
- Soil socks. Fill a burlap sack or an old cotton pillowcase with soil and compost, tie it shut, and tuck it into the end of a crack or into a hole that won’t hold loose soil. You can even cut small slits and plant right into it. In time the fabric rots away, and the roots hold everything together.
- Stick fences. Push a row of sticks into the end of the crack and weave smaller twigs between them to hold back the soil.
- Living plugs. Plant something with a dense, fibrous root mass, like grasses or creeping thyme, right at the low end. Once established, the roots become the dam.
Let the Seasons Help
Every fall, rake up leaves and stuff them into the voids by the armload. Leaves are free, they pack down tightly over winter, and by spring they’ve begun turning into the start of new soil. Chop-and-drop comfrey leaves over the cracks all summer for the same reason. Over the years, the plants themselves will keep filling the cracks with their own falling leaves.
Plants That Love Life in the Rocks
- Tough pioneers to start with: comfrey, yarrow, oregano, creeping thyme, and mint. Comfrey is especially good, since its deep roots reach into the cracks and its big leaves mulch the pockets around it.
- Ozark natives: wild columbine, Missouri evening primrose (Ozark sundrops), purple coneflower, black-eyed Susan, butterfly weed, coreopsis, and little bluestem grass, many of which grow wild on rocky glades and bluffs.
- For the hottest, driest spots: sedums, yucca and the native eastern prickly pear cactus.
- Trailing plants: strawberries and creeping herbs can spill over the stones and cover the openings of holes that aren’t filled yet.
Water new plantings well through their first season. After that, most rock garden plants take care of themselves.
Prickly Pear and Yucca: Natives for the Hottest Rocks
The sunniest, driest pockets of the boulder cascade are perfect for two tough natives that already grow wild on rocky Ozark glades: eastern prickly pear cactus and yucca. Both love full sun, need almost no water once they’re settled in, and ask mainly for good drainage, which a boulder wall has plenty of. Once they take hold, they spread slowly into living clumps that help hold soil between the stones.
Eastern Prickly Pear
- A true Arkansas native. According to the Arkansas Native Plant Society, eastern prickly pear grows across most of the state on sunny rocky hillsides and glades, and it handles both drought and cold. If trees start to shade it, it fades, so give it the brightest, hottest spot you have.
- Easy to start from a single pad. Detached pads root readily. Cut or break off a pad, let the cut end dry for several days so it seals over, then set that end an inch or two into gritty soil in a rock pocket. Pads that break off and land on soil often root all by themselves.
- Handle with care. Besides the big spines, prickly pear has tiny hair-like bristles called glochids that stick in skin and are hard to remove. Use thick leather gloves or kitchen tongs, or wrap a folded sheet of newspaper around a pad to lift it.
- Food and folk medicine. The young pads (nopalitos) and ripe fruit (tunas) are edible once the glochids are cleaned off. Split pads have also long been used as cooling poultices in folk healing traditions.
Yucca
- Another native of rocky hillsides. Arkansas yucca, also called soapweed, grows naturally on sunny prairies, glades, and rocky hillsides throughout much of the Interior Highlands, which include the Ozarks. It’s an evergreen rosette that slowly forms colonies.
- Plant it deep. Set a young yucca, or a rooted offshoot dug from the side of an established plant, into a deep pocket with good drainage. Its long, tough roots help anchor soil among the rocks.
- A plant with a partner. Yucca flowers are pollinated by a special partner, the yucca moth, and the plant doesn’t bloom every year. When it does, the tall stalk of creamy bells is a showstopper.
- Soap from the ground. As the name soapweed suggests, yucca roots have long been used to make a natural soapy lather.
More Medicinal Plants for Rocky Ground
Growing medicinal plants right in the rocks is one of my great joys. Besides comfrey, yarrow, oregano, and thyme, which are already in the cascade list above, mullein and plantain both thrive in poor, rocky, well-drained soil, and purple coneflower (echinacea) grows wild on Ozark glades. A boulder cascade can become a living medicine chest.
Clay: A Healing Gift Already in the Ground
The Ozarks are full of clay, and this land is no exception. Dig below the rocky topsoil almost anywhere and you’ll find it. Most people who use clay for healing buy it in small jars at the store. But sometimes a large amount of clay is needed all at once, for a big poultice or an old-fashioned earth pack. It makes sense to save clean clay whenever you dig a garden bed, a pond, or a foundation: take it from below the topsoil, well away from roads and animal areas, dry it in the sun, and store it until it’s needed.
Potter Melissa Weiss dug and processed wild clay from her own land in the Arkansas Ozarks. Her method for pottery is linked below, and it shows just how much clay is waiting under our feet. I won’t try to teach how to use clay for healing here. The books and articles below do that far better than I could.
Clay and Snakebite
In Return to Nature, published in English in 1903, the German nature-cure pioneer Adolf Just wrote about the healing power of the earth. I read there about a tribe that, when someone was bitten by a very poisonous snake, buried the person in the earth up to the head, and the person was healed. Just believed so strongly in healing earth that he later founded a company to make healing clay. The whole book is free to read online, linked below. Another classic on healing with clay is Our Earth, Our Cure by Raymond Dextreit. And Marjory Wildcraft of The Grow Network wrote Snakebite!, the story of how she treated her own venomous snakebite at home.
The Boulder Cascade at the Living Springs Log House
Over the years I transformed the boulder cascade, planting lots of comfrey and stuffing cotton rags and organic matter into the holes to keep the soil from falling through to the next one. I love to scramble around on those boulders, and at 72, that’s pretty good! There’s lots of potential now, but it still needs more work. This huge space could become one of the most beautiful parts of the property: a cascade of flowers, herbs, and native plants tumbling down the hillside, alive with bees and butterflies, holding the slope together with roots as well as rocks.
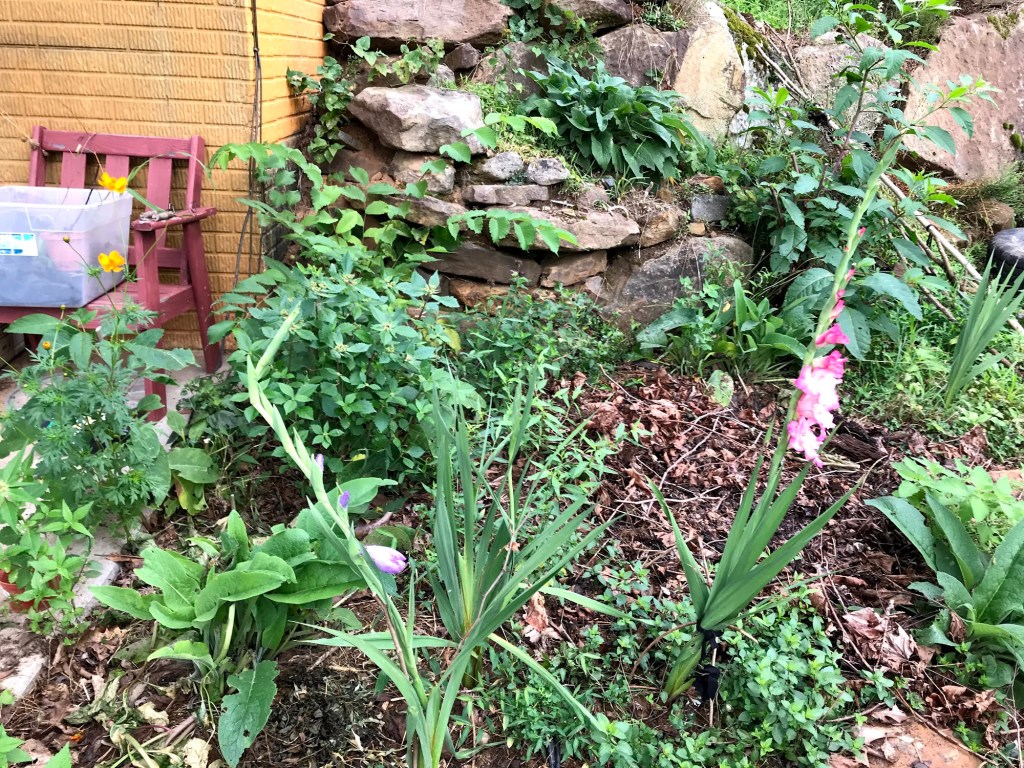
Whoever comes next has a ready-made rock garden waiting for them. All it needs is creativity, a lot of organic matter, and some patience.
Read more: Hugelkultur: Building Garden Beds From Logs, Leaves, and Time, Comfrey: The Plant I Planted Once and Never Had to Plant Again, Caring for a Steep Hillside Behind Your House, and The Spectacular Permaculture, Wild Edible, Pollinator, Native Gardens.
For More Ideas
- Arkansas Snake Guide – Arkansas Game and Fish Commission
- Venomous Snakes – CALS Encyclopedia of Arkansas
- Missouri Evening Primrose – Missouri Department of Conservation
- Know Your Natives: Eastern Prickly Pear – Arkansas Native Plant Society
- Know Your Natives: Arkansas Yucca – Arkansas Native Plant Society
- Return to Nature by Adolf Just (1903 English edition) – free to read in full at the Internet Archive
- Adolf Just – Wikipedia
- Our Earth, Our Cure by Raymond Dextreit
- Snakebite! by Marjory Wildcraft
- Medicinal Clay – Wikipedia (history of healing with clay, plus cautions)
- Going Local: How to Dig and Process Your Own Clay – Ceramic Arts Network (wild clay dug in the Arkansas Ozarks)
This article was written collaboratively by Patricia and Claude, an AI assistant made by Anthropic. Patricia shared her vision for the boulder cascade and the methods she used, including cotton rags to stop soil from falling through, and Claude researched rock gardening, permaculture principles, and snake safety.
Related articles
- Hugelkultur: Building Garden Beds From Logs, Leaves, and Time
- Comfrey: The Plant I Planted Once and Never Had to Plant Again
- The Garden That Grew From a Trench: Nine Years of Feeding the Soil at Living Springs Log House
- Living Safely with Snakes, Ticks, Chiggers, and Mosquitoes: A Natural Solutions Guide


[…] Native plants, wild edibles, flowers, and pollinator plantings established near the house, many perennial or self-seeding. Read more: The Spectacular Permaculture, Wild Edible, Pollinator, Native Gardens, Medicinal and Other Plants Come Up Every Year, Comfrey: The Plant I Planted Once, and From Rock Pile to Rock Garden […]
LikeLike
[…] Fill in the nooks and crannies of the rock cascade so snakes don’t have places to live. Read more: From Rock Pile to Rock Garden […]
LikeLike
[…] From Rock Pile to Rock Garden: Reclaiming a Boulder Cascade With Permaculture […]
LikeLike